Introduction to 3-Ingredient Homemade Mounds Bars
Imagine the enticing blend of chocolate and coconut that defines 3-Ingredient Homemade Mounds Bars. One bite of these delectable treats takes you on a nostalgic journey, evoking sweet childhood memories with every chewy, chocolatey morsel. The beauty of this recipe lies in its simplicity, requiring just three core ingredients. This convenience doesn’t compromise flavor; rather, it magnifies it, allowing the natural sweetness of coconut to shine through without all the fuss.
Creating homemade versions of your favorite candy bars can transform your snacking experience. Not only do you know exactly what goes into your treats, you can also customize the sweetness and texture to suit your preferences. Plus, with minimal ingredients and a quick prep time, you can whip these up in just a few moments—perfect for when that chocolate craving hits unexpectedly.
Crafting your own Mounds bars at home is a game changer for several reasons:
Why These Mounds Bars Are a Game Changer
-
Healthy Alternative: Ditch the store-bought options loaded with preservatives and high fructose corn syrup. By making your own 3-Ingredient Homemade Mounds Bars, you control the quality of every ingredient, ensuring a healthier snack.
-
Customization: Who says you have to stick to classic flavors? Feel free to enhance your bars with additional ingredients like crushed nuts or a hint of vanilla extract. The possibilities are endless!
-
Fast and Simple: With such minimal ingredients, preparing these bars can be done in mere minutes. Ideal for those busy weeknights when you need a quick dessert or treat.
-
Satisfying Sweetness: The combination of rich chocolate with sweet, chewy coconut creates a perfect balance that satisfies your sweet tooth without overwhelming it.
-
Budget-Friendly: With only three core ingredients, making your own candy bars is a fantastic, economical way to satisfy your cravings without breaking the bank.
Indulging in these homemade Mounds bars is not just about the taste; it’s about the joy of creation and the satisfaction of enjoying a treat crafted with love. So, roll up your sleeves and get ready to make some magic in the kitchen with this easy, delightful recipe!
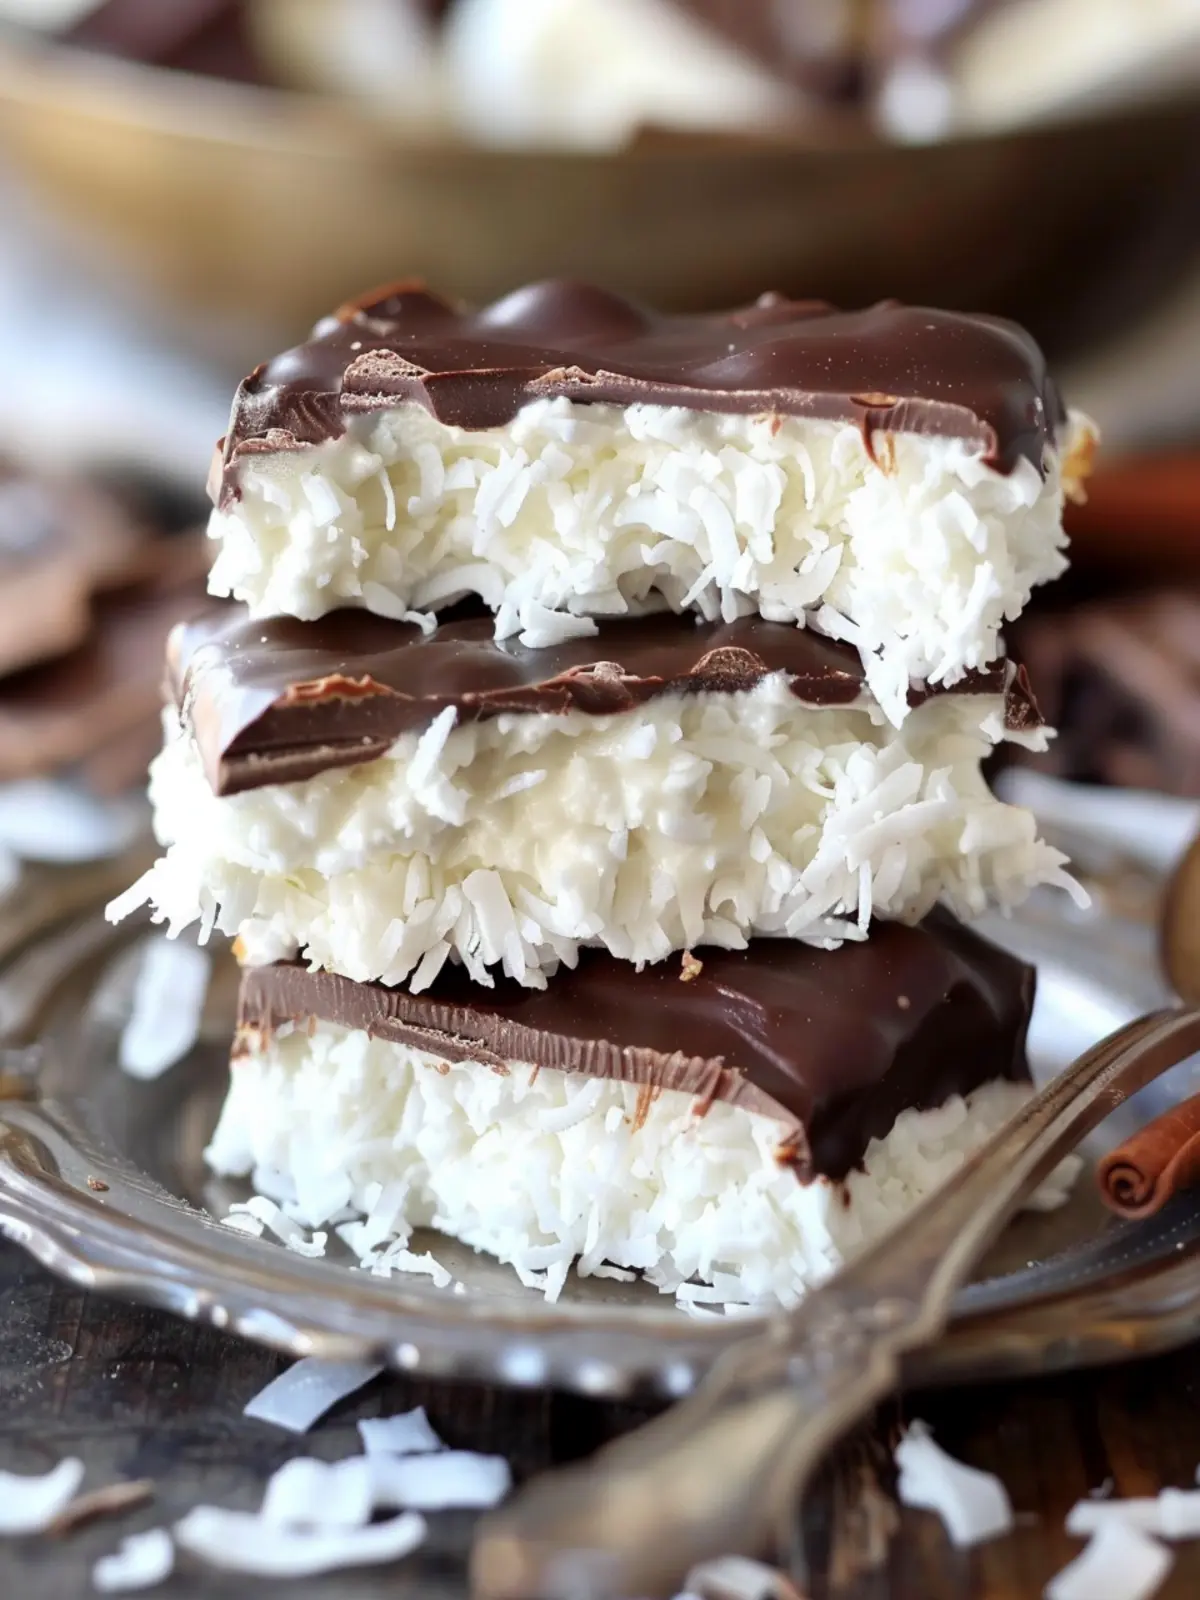
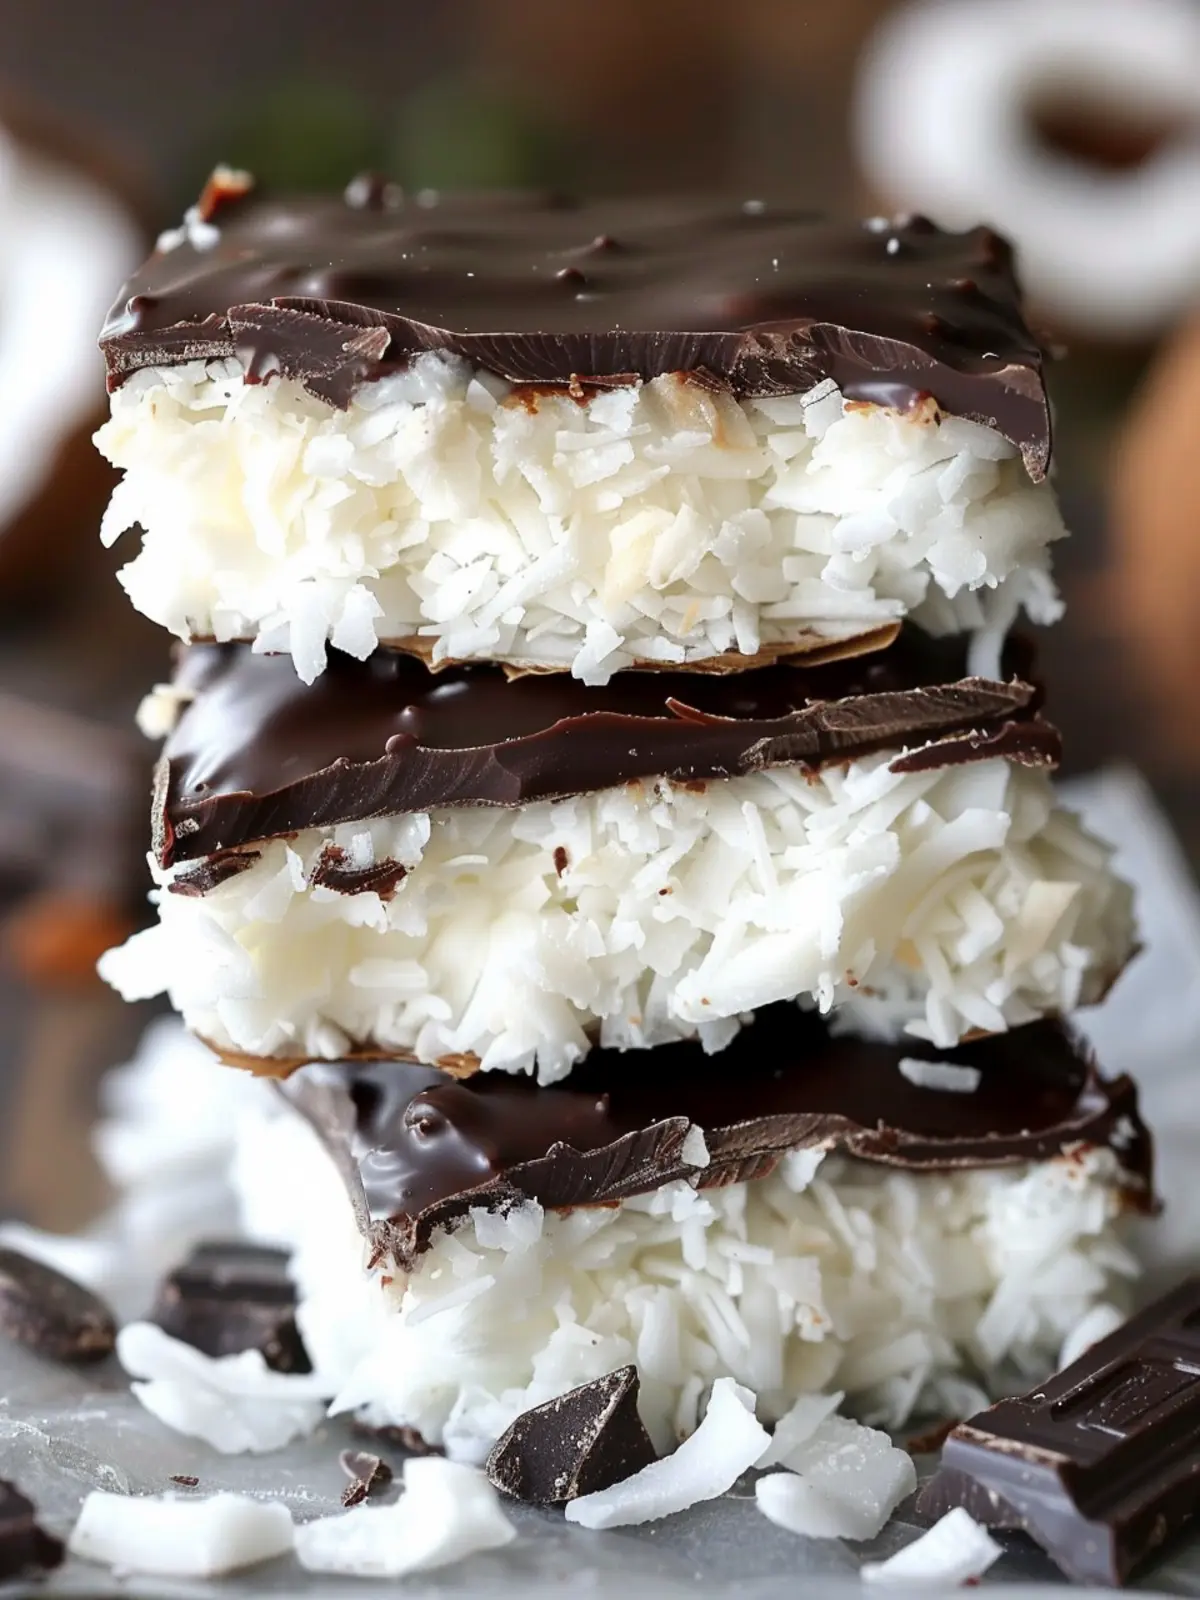
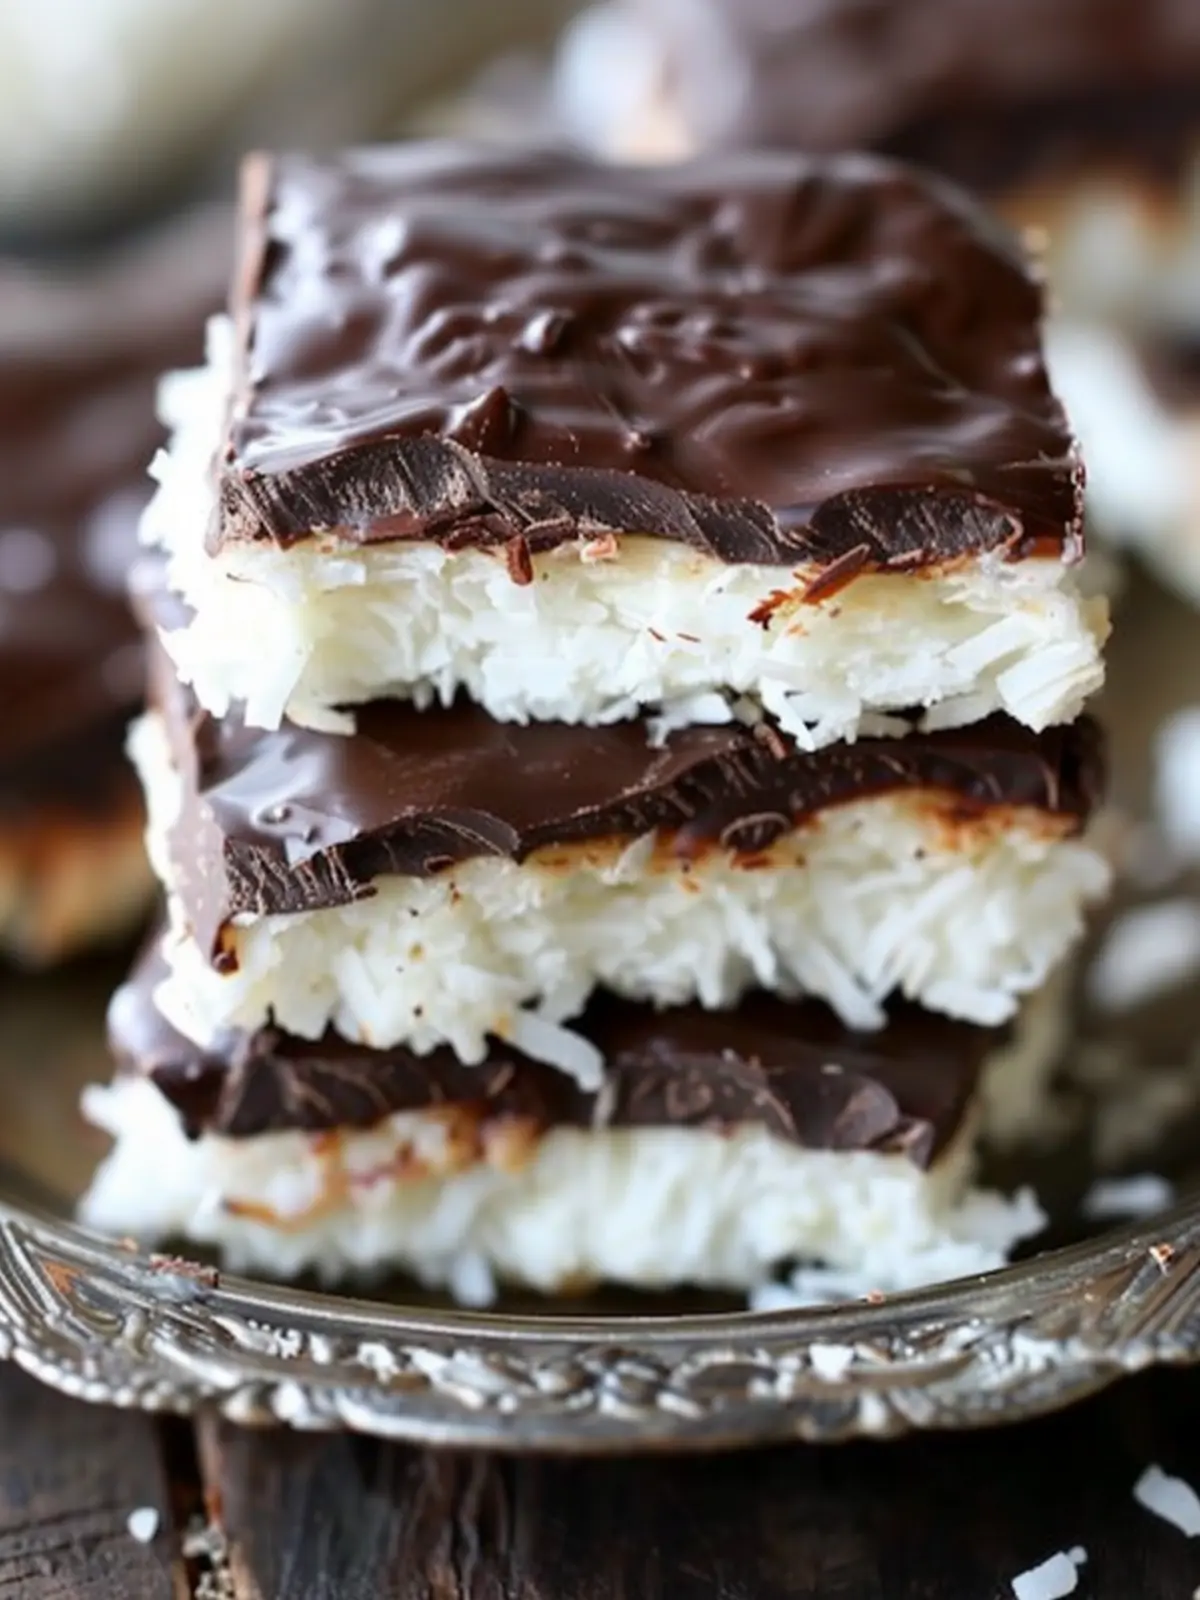
Coconut: The star ingredient that adds a tropical vibe
At the heart of these 3-Ingredient Homemade Mounds Bars is the coconut. Using shredded coconut gives these bars that sweet and chewy texture we all crave. I prefer unsweetened shredded coconut for a more authentic taste, but if you love a sweeter bar, feel free to opt for sweetened. Either way, coconut brings a delightful, tropical essence that instantly transports you to sun-soaked beaches with every bite.
Sweetened Condensed Milk: For sweetness and binding, this magical ingredient ties it all together
Next up is sweetened condensed milk, that velvety, thick ingredient that works like magic in this recipe. It not only adds the right amount of sweetness but also acts as a binding agent that keeps the coconut shreds together. Just a little scoop elevates the flavors and brings everything into a luscious, creamy union—making your Mounds Bars irresistible.
Dark or Semi-Sweet Chocolate: The luscious coating that brings it all home
The final touch for your 3-Ingredient Homemade Mounds Bars is a generous coating of dark or semi-sweet chocolate. Melting down chocolate gives you that rich, glossy layer that contrasts beautifully with the fluffy coconut filling. Plus, the slight bitterness of dark chocolate balances the sweetness perfectly, creating a bar that’s decadent yet satisfying.
Why You’ll Love This Recipe
Simple and quick preparation
Imagine standing in your kitchen, craving something sweet, but feeling the weight of a busy life pulling you away from complicated recipes. That’s where the 3-Ingredient Homemade Mounds Bars come to the rescue. With just three simple ingredients—shredded coconut, chocolate, and sweetened condensed milk—you can whip up this delicious treat in no time. There’s no need for complicated steps or fancy equipment; just melt, mix, and chill! In under 30 minutes, you can have a delightful dessert ready to enjoy.
Healthier than store-bought
Let’s be honest: those store-bought candy bars often come with a lengthy ingredient list filled with preservatives and artificial flavors. With these 3-Ingredient Homemade Mounds Bars, you gain complete control over what’s going into your body. By choosing high-quality chocolate and fresh coconut, you’re creating a treat that’s not just indulgent but also made with care. Plus, these bars offer the joy of homemade goodness without the guilt.
Perfect for sharing and snacking
Picture this: you have friends over, and the snack table is looking a little bare. This is your moment to shine! The 3-Ingredient Homemade Mounds Bars are not only incredibly tasty but also the perfect conversation starter. Cut them into bite-sized pieces, and watch your guests indulge in something so simple yet satisfying. They’re ideal for sharing during movie nights or potlucks, making you the star of any gathering. Whether you enjoy them solo or share with friends, these bars are sure to become a favorite!
Variations
Nutty Bliss: Incorporate Chopped Nuts for Added Crunch
While crafting your 3-Ingredient Homemade Mounds Bars, consider tossing in some chopped nuts, like almonds or pecans. They bring an unexpected crunch that harmonizes beautifully with the chewy coconut. Plus, that delightful contrast will elevate your homemade bars to new heights!
Flavor Twist: Use Flavored Chocolate for a Unique Finish
For a fun and inventive twist, why not swap out standard chocolate for flavored varieties? Think dark chocolate with espresso or white chocolate infused with vanilla—each will lend your 3-Ingredient Homemade Mounds Bars a distinct character. It’s an easy way to impress friends during those weekend gatherings!
Coconut-free Option: Substitute with Almond Flour for a Different Take
If you’re not a fan of coconut or have dietary restrictions, feel free to use almond flour instead! This substitution offers a new texture and flavor profile entirely. You’ll still achieve that luscious, sweet treat vibe while tailoring your 3-Ingredient Homemade Mounds Bars to fit personal preferences.
Cooking Tips and Notes
Creating 3-Ingredient Homemade Mounds Bars can feel like a magic trick in the kitchen. With just three simple ingredients, you can transform your snack game in no time. Here are some essential tips to ensure your bars come out perfect every time.
Achieving the right consistency
The key to your 3-Ingredient Homemade Mounds Bars lies in the consistency of your coconut mixture. You want it to be moist but firm enough to hold its shape. If your mixture is too dry, consider adding a touch of coconut milk or a bit more shredded coconut. If it’s too wet, let it sit for a few minutes to thicken. Testing small amounts can help you find the ideal balance.
The importance of chilling your bars
Patience is a virtue! After shaping your bars, chilling them in the fridge is crucial. This allows the coconut to set and makes it easier to coat them in chocolate. Aim for at least 30 minutes. You’ll be surprised at how much better they taste when they’re well-chilled—trust me.
Tips for perfect chocolate tempering
Tempering the chocolate is what elevates your Mounds Bars to candy bar status. Gradually melt your chocolate in a double boiler and never let the temperature exceed 115°F. Once melted, cool it down to around 85°F before dipping. This ensures your chocolate has a shiny finish and a satisfying snap. A little patience goes a long way!
Serving Suggestions
3-Ingredient Homemade Mounds Bars are not just a delightful treat on their own; they can elevate your culinary experience when paired thoughtfully. Let’s explore some fun ways to enjoy these bars that might just surprise you.
Pairing with Coffee or Tea
Imagine savoring your rich Mounds Bars alongside your morning coffee or afternoon tea. The sweetness of the chocolate complements the bitterness of coffee beautifully. If you prefer tea, try pairing them with a chai latte for a spicy kick, or a classic Earl Grey for a fragrant touch. Both options create a great balance, making your sweet treat even more satisfying.
Topping for Yogurt or Dessert Plates
Consider crumbling your 3-Ingredient Homemade Mounds Bars over a bowl of creamy yogurt or as a decorative element on dessert plates. The crunch and sweetness add a delightful contrast to tart, tangy yogurts or even ice creams. It’s an effortless way to impress guests at your next gathering while adding a layer of indulgence to simpler desserts.
Creative Presentation for Special Occasions
Want to make an impression? Cut your bars into elegant squares or triangles and arrange them on a beautiful platter. For an upscale touch, drizzle melted dark chocolate over them and sprinkle with sea salt. You can also wrap individual bars in colorful parchment paper tied with twine for a charming gift. Whether it’s a birthday party or a casual get-together, these presentation ideas will elevate your homemade treats and wow your guests.
Time Breakdown
Creating your own 3-Ingredient Homemade Mounds Bars is an enjoyable experience that requires just a bit of your time! Here’s how it breaks down:
Preparation time
You only need about 10 minutes to prepare your 3-Ingredient Homemade Mounds Bars. This quick prep stage makes it easy to whip up a delightful treat even on a busy day.
Freezing time
After mixing and shaping, let your bars freeze for about 30 minutes. This step ensures the chocolate coating sets perfectly for a delightful crunch.
Total time
In a nutshell, the total time to indulge in these luscious bars is just about 40 minutes. Isn’t that a sweet deal? Now, let’s get started on making these delicious treats!
Nutritional Facts
When you indulge in these 3-Ingredient Homemade Mounds Bars, you’re not just treating yourself; you’re sneaking in some nutrition, too! Let’s break down the nutritional profile of this delectable treat.
Calories and Serving Size
Each bar contains approximately 150 calories, making it a satisfying yet guilt-free snack. The recommended serving size is one bar, perfect for a quick pick-me-up during a busy day.
Fat, Carbs, and Protein Breakdown
These homemade delights are rich in healthy fats, with about 12 grams coming from coconut and chocolate. They also provide around 10 grams of carbs, primarily from natural sugars, while offering a modest 2 grams of protein. This balanced profile will keep you feeling energized without overloading on sugar. Enjoy these 3-Ingredient Homemade Mounds Bars for a delightful bite that respects your dietary needs!
FAQs about 3-Ingredient Homemade Mounds Bars
Crafting delectable 3-Ingredient Homemade Mounds Bars is not only a satisfying experience, but it also raises some common questions. Let’s tackle them so you can whip up these treats with confidence.
Can I use different types of chocolate?
Absolutely! While dark chocolate gives Mounds Bars their signature taste, you can experiment with various types. Semi-sweet chocolate offers a balanced sweetness, while milk chocolate results in a creamier texture. If you’re feeling adventurous, try using white chocolate for a unique twist. Just keep in mind that different chocolates may alter the flavor profile slightly, so choose one that aligns with your personal preference.
How long do these homemade bars last?
When you store your 3-Ingredient Homemade Mounds Bars properly, they can last up to a week in the refrigerator. Be sure to place them in an airtight container to maintain their freshness. If you want to keep them longer, consider freezing them. Just wrap individual bars tightly in plastic wrap and place them in a freezer-safe container. They can keep for up to three months frozen!
Can I use fresh coconut instead of shredded?
Using fresh coconut is an option, but it may change the texture and moisture content of your bars. If you prefer the taste and texture of freshly grated coconut, adjust the sweetness and let them set a little longer in the fridge to ensure they hold together well. However, for consistent results, shredded coconut is recommended, as it mixes and sets well with the chocolate and sweetener.
With these tips in mind, you’re all set to create your homemade Mounds Bars! Let your creativity flow and enjoy every bite!
Conclusion on 3-Ingredient Homemade Mounds Bars
Delighting in the simplicity of 3-Ingredient Homemade Mounds Bars can make any day feel a little sweeter. As you savor the rich chocolate and creamy coconut, it’s hard not to appreciate the joy of homemade treats made with just a handful of ingredients. These bars are perfect for satisfying that afternoon craving or as a guilt-free dessert for guests. With minimal prep time, you can whip them up in no time, leaving you with more moments to share laughter and memories. So, roll up your sleeves, indulge your sweet tooth, and treat yourself to these delightful bites!
3-Ingredient Homemade Mounds Bars
Indulge in these easy, no-bake homemade Mounds bars with just three simple ingredients! Perfect coconut-filled treats dipped in rich chocolate for a satisfying sweet treat that rivals the store-bought version.
Ingredients
- 3 cups unsweetened shredded coconut
- 14 oz sweetened condensed milk
- 15 oz dark or semi-sweet chocolate
Instructions
Nutrition Information
Calories: Approximately 200 per bar
Fat: 10g
Carbohydrates: 26g
Protein: 2g